
Most dents on an aircraft will never be repaired. They’ll be measured, found within limits, and written down, and that written record is the only thing that will ever stand between the dent and the next person who finds it. So the repair isn’t the skill that matters most here. The record is.
Yet few engineers are ever taught how to record aircraft structural damage well. They learn by copying the entry above theirs in the dent and buckle chart, gaps and all.
What does it take to record aircraft structural damage properly?
A good defect record answers four questions for someone who wasn’t there: where it is, what it is, whether it’s acceptable, and what was done. If any one of those is vague, the record fails the day someone actually needs it.
That “someone” could be a night-shift engineer deciding whether to release the aircraft. It could be an auditor asking for the approved data behind a repair. Or it could be a lessor’s technical representative walking the aircraft at redelivery with a torch and a very long checklist.
Step 1: Check whether the defect is already on record
Before you measure anything, look it up. The most expensive dent in aviation is the one that gets re-evaluated, re-photographed, and sometimes re-repaired because nobody could confirm it was already assessed.
Search the chart by area, not just by date. Damage gets recorded under the wrong frame more often than anyone admits, so check a frame or two either side. If you find a matching entry, your job becomes a comparison: has it grown, has the paint cracked, is there new damage nearby?
Step 2: Pin down the exact location using aircraft coordinates
“Lower fuselage, near the cargo door” isn’t a location. It’s a search party.
Use the aircraft’s own reference system. On Airbus types that usually means frame (FR) and stringer (STR) numbers with a side designator; on Boeing types, body station (STA), stringer, and sometimes buttock or water line. Add the zone number from your maintenance manual and the skin panel if you know it. Then measure from fixed features: the nearest frame, the nearest stringer, the nearest fastener row.
Here’s what that looks like in practice (illustrative example):
| Paper-style entry | Complete entry | |
| Location | “Dent RH lower fwd fuselage aft of cargo door” | RH, zone 132, FR 24–FR 25, STR 18R–19R, 85 mm aft of FR 24, 40 mm above STR 19R |
| Size | “Small dent, approx 30 mm” | 32 mm × 21 mm, max depth 0.9 mm, smooth-bottomed, no crease |
| Proximity | Not recorded | 38 mm to nearest fastener row, 210 mm to existing doubler (repair ref. on file) |
| Evidence | “Photo taken” | 4 photos linked: wide, mid, close-up with gauge, raking light |
The left column will get the aircraft released tonight. The right column will still make sense to a stranger in 2035.
Step 3: Measure and classify the defect
Record the damage type first, because your Structural Repair Manual (SRM) treats them differently. A smooth dent, a creased dent, a buckle, a scratch, a gouge, a nick, corrosion, and a crack each come with their own definitions and limits. Check your SRM’s own definitions rather than relying on shop-floor slang.
Then capture length, width, maximum depth, and orientation relative to the stringers. Note anything that changes the assessment: a sharp bottom, cracked paint, a scratch inside the dent, or distortion of nearby fasteners. If the SRM calls for NDT (eddy current is common for checking under a dent or gouge), record the method, the result, and the report reference.
Hand tools like a depth gauge with a bridge, a straight edge, and feeler gauges still work. But 3D measurement tools are changing this step. With 8tree’s dentCHECK, for example, the measurement results and report can be linked straight to the defect record in Dent & Buckle, so the numbers in the record are the numbers the tool measured, not the numbers someone retyped at the end of a shift.
Step 4: Photograph it for someone who wasn’t there
Most damage photos only make sense to the person who took them. A 10 cm close-up of grey paint could be anywhere on the aircraft.
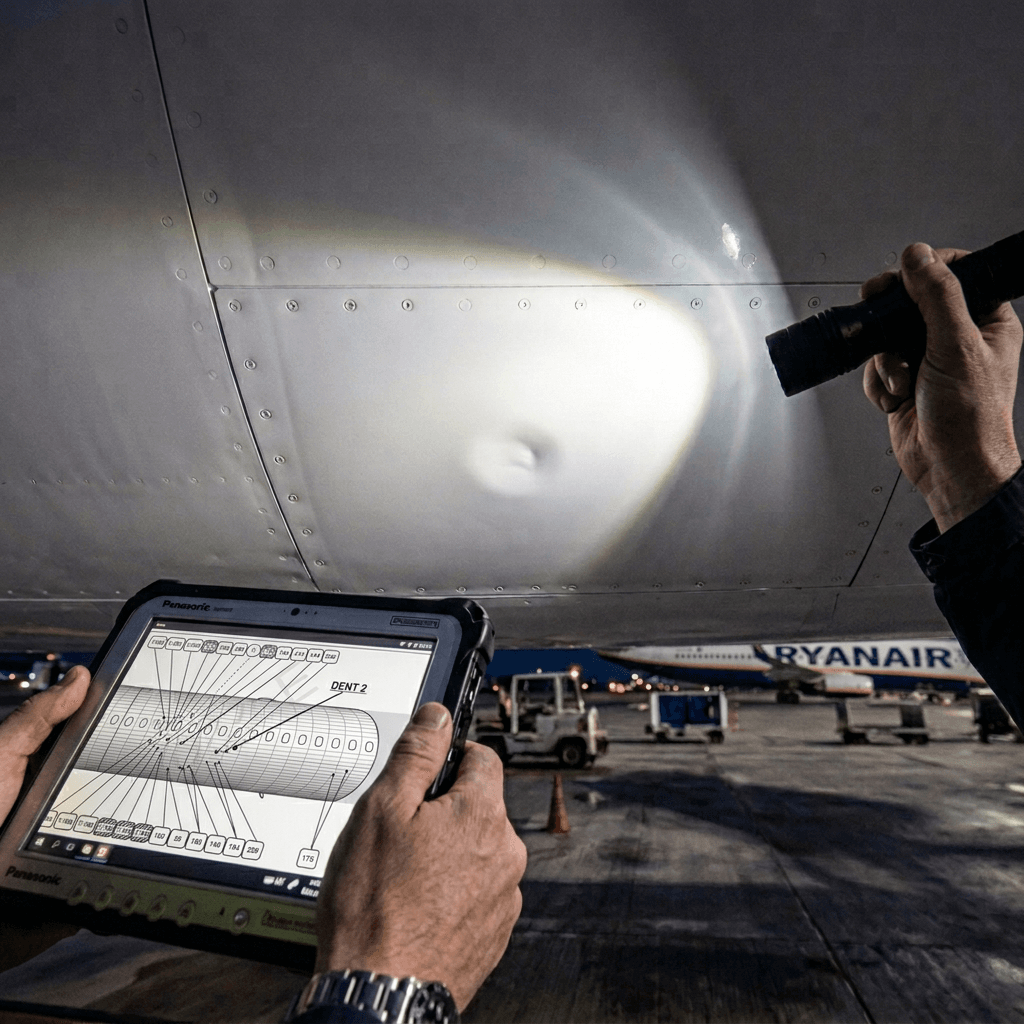
Shoot a sequence instead. Start wide enough to show a landmark like the door, an antenna, or a stencil. Then a mid shot showing frame and stringer context, a close-up with a scale or the gauge in place, and one shot with a torch held low across the surface. Raking light shows dent contour far better than flash does.
The photos have to end up attached to the record itself, not sitting on someone’s phone or in a shared drive folder called “dents_new_FINAL.”
Want to see how engineers do this on a tablet at the aircraft, even without signal? Take a look at the Dent & Buckle mobile app.
Step 5: Assess against SRM allowable damage limits
This is where engineering judgment lives, and where shortcuts hurt most.
Find the SRM chapter and figure for that exact structure. Fuselage skin, door surrounds, and wing skins sit in different chapters with different limits. Then confirm effectivity: the figure has to apply to that aircraft’s variant and modification status. Work from the current SRM revision your organisation holds, and record which revision you used.
Now apply the allowable damage limits in full, not just the depth column. Many SRM figures also limit how close damage can be to fasteners, frames, stringers, skin edges, other damage, and existing repairs. They can also account for material already removed by a previous blend-out.
Expert insight: the dent is rarely the problem. Its neighbours are.
Junior engineers check the depth, find it well inside limits, and sign. Experienced ones measure the distance to everything around it first. A 0.9 mm dent that’s comfortably within limits on its own can fall outside them once you account for an old blend 40 mm away or a repair doubler on the next bay. That’s why Step 2 asks for proximity measurements, and why a chart you can’t search by area is a real risk. If the old damage isn’t visible when you assess the new damage, you’re assessing half the picture.
If the damage is outside limits, it needs a repair from the SRM or other approved data, which may mean a request to the manufacturer or an approved design organisation. The exact route depends on your authority, your approvals, and your own procedures, so confirm it with your engineering and quality teams.
Step 6: Record the disposition and the approved data behind it
Every damage record needs a clear outcome. Typical dispositions include: within limits with no action, within limits with a repeat inspection, repaired, or temporarily repaired with a follow-up requirement. Temporary repairs usually carry an inspection or replacement threshold, and that threshold must be tracked, not just written down.
Reference the data you used: SRM chapter, figure, and revision, or the repair approval reference. Add the work order or task card, the NDT report if there is one, and the certifying signature and date.
This isn’t bureaucracy for its own sake. In the US, 14 CFR 43.9 requires maintenance record entries to describe the work performed (or reference acceptable data), with the completion date and the name of the person who did it. EASA’s continuing airworthiness rules set comparable record-keeping expectations. The specific requirements for your operation live in your approved exposition and your authority’s rules, so check those rather than taking a blog’s word for it.
Step 7: Update the master chart and link the damage to the component
The record isn’t finished when the task card is signed. It’s finished when the master dent and buckle chart shows it, in the right place, attached to the right part.
That last point matters more than most operators realise. Flaps, rudders, cargo doors, access panels, and radomes move between aircraft and in and out of stores. If your records are organised per tail number, a flap’s damage history stays on the aircraft it left. Its new aircraft inherits a clean-looking flap with an unknown past.
Dent & Buckle handles this by being component-based: defects stay with the part wherever it moves in the fleet or into stores. When the flap goes from tail A to tail B, its dents go with it. On the ramp, the workflow is simple: an engineer taps the damage location on the 3D aircraft model, attaches the photos and measurements, and the record syncs when the device is back online. The next person searching that area sees everything, including the damage on neighbouring components.
Where damage records usually fail: audits, ground time, and lease return
Poor damage recording rarely causes a problem on the day. It causes one months later, usually at the worst possible time.
During an audit, it shows up as a repair nobody can trace to its approved data. On the line, it shows up as a delay while someone phones technical records at 06:00 to ask whether a dent is new. And at aircraft lease return, it shows up as weeks of reconstructing an aircraft damage mapping from paper, spreadsheets, and memory, while the lessor’s representative waits and the aircraft stays on the ground.
The seven steps above solve most of this on paper, if everyone follows them every time. The hard part is making that the easy path. That’s the real case for moving away from paper: a system where the complete record is also the fastest one to create.
Recording aircraft structural defect, the short version
A good record answers where, what, whether it’s acceptable, and what was done, for someone who wasn’t there. Check existing records first, locate with frames, stringers, and measured distances, and photograph in a sequence. Assess against the full SRM limits, including proximity to other damage, and tie every disposition to approved data. Then make sure the damage follows the component, not just the tail number.
If you’d like to see how other airlines handle this, from the ramp to the lease return report, join a live 60-minute session with our team. You’ll see the full workflow, talk through your current process, and leave with a cost estimate for your fleet.
_______________________________________________________________________________________________________________________________
FAQ
Check whether it’s already on record, then locate it by frame, stringer, and measured distances. Measure length, width, and depth, photograph it in a sequence, assess it against SRM limits, and record the disposition with the approved data used.
Each entry needs the exact location, damage type and dimensions, distances to fasteners and nearby damage, photos, the SRM reference and revision, the disposition, any repeat inspection, the work order, and the certifying signature and date.
Lessors expect a complete, traceable history of every damage and repair. Missing or unclear records can delay redelivery, trigger re-inspections, and affect the aircraft’s value.
Use the SRM figure that applies to that structure and that aircraft’s effectivity. Check depth and size limits, plus proximity limits to fasteners, frames, stringers, and other damage or repairs. If in doubt, escalate to your structures engineering team.